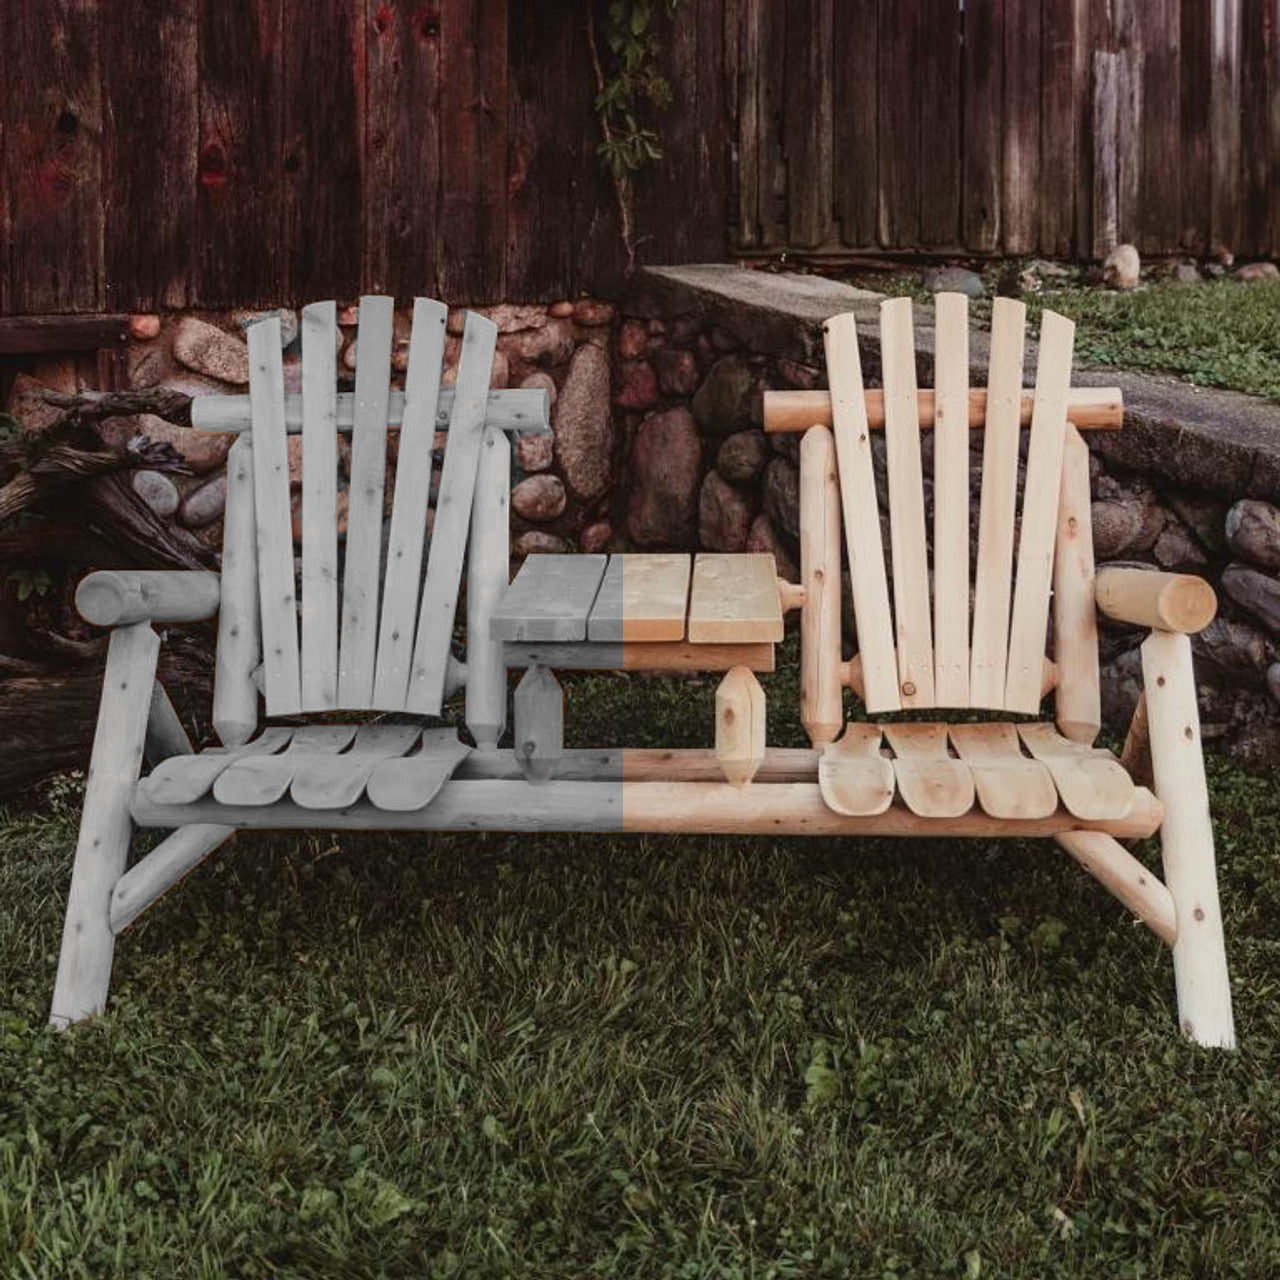
Your outdoor cedar log furniture was gorgeous the day you brought it home — warm, golden, and smelling like the mountains. But after a few seasons of sun, rain, and snow, that honey tone can fade to a tired gray. Sound familiar? Here's the good news: you don't need to replace a thing. With the right approach, you can restore outdoor cedar log furniture to its original beauty and keep it looking fantastic for years to come.
Whether you're bringing back a beloved cedar log patio bench or refreshing an entire deck's worth of seating, this guide walks you through every step. Cleaning, scrubbing, sanding, and finishing — we'll cover it all so you can spend less time worrying and more time relaxing outdoors.
Why Does Cedar Log Furniture Turn Gray?
First, let's talk about what's actually happening. Cedar is a naturally resilient wood — it resists rot and insects better than most species. But it's not invincible. Ultraviolet light breaks down the wood fibers on the surface, causing that silvery-gray patina. Add moisture, mildew, pollen, and everyday dirt, and your furniture starts looking decades older than it really is.
The gray layer is only surface-deep, though. Underneath, the wood is usually in great shape. That's what makes cedar log furniture such a smart long-term investment. A little maintenance goes a long way.
Step 1: Power Wash Away Years of Buildup
The fastest way to strip away surface grime is with a power washer. Dirt, algae, mildew, and loose gray fibers will blast right off, revealing the fresher wood underneath. Here's how to do it without damaging your furniture:
Power Washing Tips for Cedar
- Use a wide nozzle (25–40 degrees). A narrow, high-pressure nozzle can gouge soft cedar. Go wider and let the water do the work.
- Keep your distance. Hold the nozzle 12–18 inches from the surface. Too close and you'll splinter the wood.
- Follow the grain. Use smooth, overlapping strokes in the direction of the wood grain. Never park the nozzle in one spot.
- Test first. Pick an inconspicuous area and test your pressure before going full speed on a visible surface.
- Rinse thoroughly. Once you've covered the entire piece, do a final rinse with clean water to flush away loosened debris.
Power washing alone can be transformative. But if you've got stubborn stains, dark mildew spots, or deeply embedded grime, the next step will handle those.
Step 2: Scrub for a Deeper Clean
Sometimes a power washer isn't enough — especially on textured log surfaces where dirt likes to hide. A good scrub with the right solution will get into every crevice. Here are three approaches that work beautifully on cedar:
Natural Cleaning Solutions
Baking soda and vinegar: Mix baking soda with white vinegar to form a paste. Apply it directly to stained or discolored areas, let it sit for 10–15 minutes, then scrub with a stiff-bristle brush. This is gentle, eco-friendly, and surprisingly effective on mildew.
Oxygen bleach (sodium percarbonate): Mix with warm water according to the package directions. Apply generously, let it work for 15–20 minutes, and scrub. Oxygen bleach brightens wood without the harshness of chlorine bleach — it won't damage the cedar fibers or harm nearby plants.
Commercial wood cleaner: If you prefer a purpose-built product, look for a cedar-safe wood cleaner or brightener at your local hardware store. Follow the label instructions carefully.
Scrubbing Best Practices
Use a medium-to-stiff natural bristle brush — not a metal wire brush, which can scar the wood. Scrub with the grain, not against it. Work in sections so your cleaning solution doesn't dry before you can scrub and rinse. After scrubbing, rinse everything thoroughly with your garden hose or a low-pressure wash.
Let the furniture dry completely — at least 48 hours in warm weather — before moving on to the next step. Patience here pays off.
Step 3: Light Sanding to Reveal Fresh Wood
Once your furniture is clean and fully dry, a light sanding will smooth any raised grain and expose a fresh layer of beautiful cedar. This step makes a noticeable difference in how your finish coat absorbs and how polished the final result looks.
Use 120- to 150-grit sandpaper. Sand by hand on contoured log surfaces — a power sander can be too aggressive on rounded shapes. Always sand with the grain. You're not trying to reshape anything. You're just knocking down fuzz and opening up the pores of the wood.
Wipe down every surface with a tack cloth or damp rag afterward to remove all sawdust. Dust left behind will get trapped under your finish and create a rough, bumpy texture.
Step 4: Apply a Protective Finish to Your Cedar Furniture
This is where the magic really happens — and where you protect all the work you've just done. A quality finish will seal out moisture, block UV rays, and keep your cedar looking rich and warm through every season.
Choosing the Right Finish
For outdoor cedar log furniture, you have a few solid options:
- Penetrating oil finish (tung oil or Danish oil): Soaks into the wood and enhances the natural grain. Offers moderate protection and a beautiful, natural look. Will need reapplication every 1–2 years.
- Exterior wood stain with UV protection: Available in transparent, semi-transparent, and solid tones. A semi-transparent stain is ideal — it lets the cedar's character show through while adding strong UV and moisture protection.
- Spar urethane or marine-grade varnish: The heaviest-duty option. Best for furniture that takes a real beating from the elements. Offers excellent protection but requires more prep for reapplication down the road.
Application Tips
Apply your chosen finish with a natural bristle brush, working it into every nook and log joint. Thin, even coats are better than one thick one. Two coats is the sweet spot for most products — let the first coat dry completely before adding the second. Check the product label for dry times, and avoid applying finish in direct sun or extreme humidity.
How to Keep Your Cedar Log Furniture Looking Great
Restoration is rewarding, but ongoing care is what keeps your furniture looking grand season after season. Here are some simple habits that make a big difference:
- Cover or store during harsh weather. A breathable furniture cover goes a long way during winter or extended rainy stretches.
- Clean annually. A light wash with a garden hose and mild soap each spring prevents heavy buildup.
- Reapply finish every 1–2 years. Touch up high-wear areas and recoat as needed. It's much easier to maintain a finish than to strip and start over.
- Keep furniture off wet ground. Elevating legs on pads or pavers prevents moisture from wicking up into the wood.
These small steps will add years — even decades — of life to your furniture.
Worth the Effort, Every Time
There's something deeply satisfying about bringing weathered wood back to life. That first moment when you see the golden cedar reappear under the gray — it never gets old. Your outdoor cedar log furniture was built to last, and with a little care, it will.
If you're ready to add to your outdoor collection — or if you've been inspired to start fresh — take a look at our 6-foot cedar log patio bench or our popular 6-foot log picnic table with attached benches. Every piece is crafted from solid cedar right here in the USA, built to handle the outdoors and age beautifully — especially when you know how to take care of it.
Got questions about maintaining your Lakeland Mills furniture? We're always happy to help. Drop us a line — we love talking wood.
Leave a comment
This site is protected by hCaptcha and the hCaptcha Privacy Policy and Terms of Service apply.